I draw the images I want to color on paper with a pencil or marker.

I then scan them into photoshop and create layers on which I will then trace the drawings.
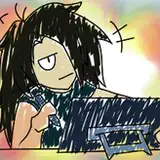
I find it hard to trace a complete shape on 1 layer in Photoshop. The lines come out wobbly or with too many overlapping strokes which are hard to clean up. See this crappy tracing below.

So I use a method that takes a few careful strokes on separate layers and then later combine the layers into 1.
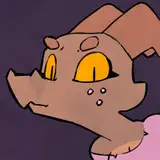
I start with the head. I make a group for the head and call it 'sillo'. (short for silhouette)
Inside the group I make 3 layers to start.

Oh and I use a very basic brush - one with no texture and very little anti-aliasing. If you have any of Kyle's brushes there is one called 'smooth criminal' that has only 1 pixel of anti aliasing.

Oh and make sure your brush is set to have pressure sensitivity and to be pointy on the ends (Minimum diameter set to 0).

OK now I'm ready for my first stroke. I draw it on the top layer in my sillo group.

In order to get the line to be smooth as possible, I draw it fast in a sweeping motion. This usually makes one end of the line go past where I want it to stop. (drawing lines slowly tends to make them wobbly.)
I turn on transparency for the first stroke then select the layer underneath and draw the second line on the other side of the shape. (I rotated the image to make it the easiest for me to draw lines. Everybody has their own best angle they like to draw on so use whatever is comfortable for you.)

Then I go to the next layer to draw my 3rd stroke. Note that each line overlaps the others slightly and these need to be cleaned up later.

I turn the transparency off on all layers but one. I will clean up one layer at a time.

I zoom in on the overlapping line.

I use the eraser tool to cut through where the line overlaps.

Then I hit the 'w' key to select the remaining part of the line.

Once selected, I hit the delete key. This eliminates the overlap.

I zoom out to see another overlapping line and follow the same steps I used for the first line.

I zoom in, rotate and cut off the overlap of layer 2.

I zoom out again to see if I got all the overlaps.

Once all the lines are smooth and connected I turn all transparent layers back to 100%.

Then I select all the layers together.

I want to merge the selected layers into just 1 layer so I use the key command 'command E' and they become one layer.

I still have to do Ren's mouth and nose. These are more complicated shapes than his cranium - which is basically egg-shaped. But I use the same steps in inking and cleaning up that I used for his skull. First I turn his merged head layer to transparent

I do a stroke for the nose and one for the left side of his mouth on 1 layer.

Then I do a couple more strokes on another layer underneath the first layer.

I make another layer and draw 2 remaining strokes to complete the shape of Ren's head. Note all the overlaps that need to be cleaned up. You can do as many strokes as you like on a layer as long as they don't touch each other.

To make it easier to see the lines and overlaps I turn off the layer with the original marker sketch.

I zoom out to see the whole head shape.

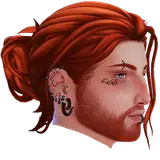
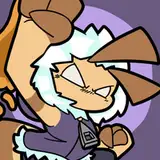
Then I erase all the overlaps the same way I did for his skull. Once cleaned up I turn all the layers to 100%, select all the layers and merge them. All of Ren's head shape is now on 1 layer. The drawing is now ready to fill with color.

Now I can select the line and the inside using the 'w' tool. This is the area I want to drop a color into.

Before I can do that though there is one more frustrating step. I have to go up to the menu and drag down the 'select' column to 'modify' then drag right to 'contract'.
A window comes up to ask you how many pixels to contract. I choose 1 because my brush has 1 pixel of anti-aliasing (fuzzy edges).

If I don't do this I will get a color halo around the line which looks lousy even when you zoom out.

I create another layer underneath the line layer and call it 'fill'. Then I drop the color in by hitting 'shift-f5'. The reason I keep the color fill layers separate from the line layers is so can select the fill later to use them as masks to paint my texture and shadows with.

I will use this process for all the other parts of the character, eyes nose, teeth etc.

You might notice that there are details still missing from the drawing, things like wrinkles and small details. I will use textured brushes to do some of those when I start rendering the drawing.