Feel free to contact me by joining the Discord Channel,
leaving a comment here,
or mailing to chambersu1996@gmail.com,
if any questions or anything here interests you~
I will reply ASAP unless I fall asleep, mostly in 12 hours~
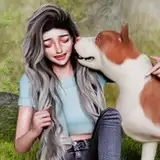
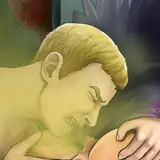
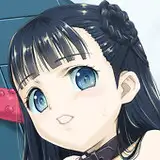
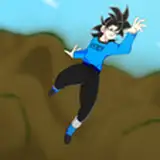
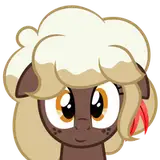
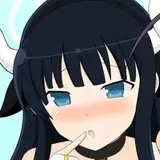
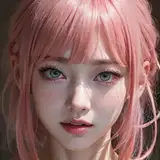
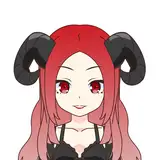
CharLib_v03_t08_Fanart_v08_packed.blend
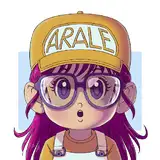
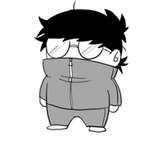
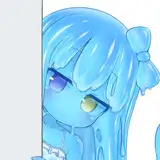
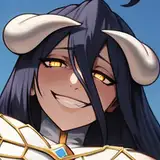
here is the downloadable preview of Ryuuko, Frieren, and Marcille,
I planned to finish/polish the characters, then I found something about their workflow to improve or test.
for assets from projects, there are deadlines for them then I have no choice but to keep them,
but for the assets for myself, which can share in public, I hope I can focus on not only the assets themselves but also their workflow,
it should benefit us in the long term/in the future.
I have already used the workflow/tools for some serious developments, practice, and improve them in real battlefield lol~
I found something that may be able to improve when nearly finished, so I plan to test more this time, I will keep improving before polishing them as product-ready assets.
Here is the outline of my current character models workflow (also a standard for every asset created in this way,
mainly focus on the full-body characters in-game levels (blue circles),
and nearly cowboy shots on cinematic game event scenes (red circles),

(one more additional level of details for a close-up if necessary, I have some ideas/solutions and should try in the future,
while retopo/rebake a low-res one for better performance is relatively easier in most cases)
the workflow includes design, modeling, texturing, body and facial rigging, and animation retargeting,
also some tests from the TODO list about mixing cloth simulation shapes to meshes,
detailing some reasonable textures’ details as a mesh instead,
pixel-art-style textures baking,
potential improvement in simplifying topology,
additional deformed bones for hems and cloak,
cage meshes for better bone weight transferring,
one more output uv to anti-aliasing…
whatever may help to improve the quality and speed when modeling.
once the workflow is stable and good enough, I will detail a guide or tutorials.
Workflow Outline
1. we need turntable design sketches of the character as the first step,

personally prefer using stable diffusion and different trained LoRA (the design tools mentioned in the old posts or my CIVITAI page Chamber Creator Profile | Civitai) to generate them,
or paint one by hand if necessary,

sometimes some artists prefer concept design artwork/painting before the turntable, it is great to get a special feeling/atmosphere and depends on the team.
for most projects, the character will have different suits along their journey,
and their suits may have several layers like underwear inside and a shirt or additional coat outside,
so we should prepare the turn table sketches of the nude body and each layer’s clothing,

recommend designing them first, instead of always guessing while modeling which may cost more, which I suffered from.
if close-up shots are necessary, consider preparing more face/hair designs,
take care of merging different views and parts of design when modeling, keep the feeling we want, and make them seamless.
personally look forward to finishing all details in one design image to make sure they are harmonious if possible, to avoid the merging issue.
2. then I will try an edge detect sketch for some of the turntable design sketches by hand on Blender, using the Grease Pencil Object,

it is optional, aiming to show in front and then highlight the edges for vertex editing easily later, IMO editing without the guidelines is annoying, so I recommend that.
3. then I will use the base body mesh to align the guidelines/design sketches.


the base mesh should improve whenever we find any issue when developing,
and an ideal base mesh should be stable and keep balance among lots of things,
(like topology, less vertex for easy editing but enough to present great static shapes and also great dynamic deformations we want,
a stable UV to transfer data like vertex groups/weights, shape keys, textures, or any attributes we want, among different characters under the same standard, which is one of the main key points to create the characters library,)
but I will leave some shape details like fingers and toes, which seem better to polish after setting the t-pose.
4. then we can care about the clothing,
use tools like inflate, knife and displacement, mask, and solidify modifiers to create the cloth proxy mesh then align them to the design sketch too,

some loose meshes differ a lot from the base body meshes like hems and cloaks may need to be rebuilt by hand,
turn on the snap-on surface trigger to edit will help a lot to create shapes along the body shapes.
5. then we will use camera space projection to texture the base body mesh and cloth proxy mesh quickly,
unwrap their UVs by camera views then use my material node trees to mix the turn table sketches as textures based on the face normal angles,
slightly tweak the projection UVs to align most of the texture details. (will fix the rest by hand later)

6. align and project the rest parts like the eyeball, lash, brow, tongue, and teeth,
most of them should have nice base meshes with textures then we can modify them easily and quickly for different characters,
7. then hairstyles, one of the hardest parts when modeling IMO, there is a special department named grooming to model hair in the industry as I know…
they are different for different characters then I have to create them by hand one by one, which mostly costs half of the work hours I spend for each character,
turntable design sketches and optional guideline objects first like bodies or clothing,
then I will find a base hair mesh from the public libraries that is the most similar to the new one, tweak and align it to the design like their body and clothing,
extrude vertex one by one to retopo along the base meshes to get the hair proxy mesh,

then use solidify, weight mix, and shrink warp modifiers for anime hair,
bevel curves work well too while I prefer/get used to vertex editing,
for realism, I will use an add-on called hair tool to create hair card meshes,

8. then we can check all the meshes should have at least one suitable UV to bake necessary textures to paint/fix by hand,

(you can use this UV as the output UV directly, but sometimes the UV good at space-filling/performance may be hard to read/paint in 2d/image viewport, so I prefer to separate them as the UV for editing and mixing, and the UV for final output)
bake the base color maps then polish them by hand,
then I test a lot for textures and shaders but they are optional, (presented on my old posts)
like using image-to-image in stable diffusion to polish the textures instead of by hand, which should deal with textures' unaligned details around the UV seams,
tried to apply seamless PBR textures,
or NPR features like 0.5 multiply the base color maps then link to both base color and emission color,
used normal edit modifiers to flatten the anime face shadow,
tried Marigold Depth Estimation/Line2Normalmap to get procedural detail height/normal maps,
faked subsurface by AO and thickness map baked from Blender cycles,
then there is an unfinished test,
try to align cloth folds details on textures when cloth simulation, by sculpting the subdivided cloth proxy meshes as their textures guide before export and simulate the shapes on Marvelous Designer.
9. sometimes I break the original base mesh topology when editing like removing one side and then editing with a mirror modifier in most cases,
so I used a geometry node tree to force the meshes to transfer to their standard UV shape (for transferring data, so keep careful to avoid breaking that UV) as shape keys,
then use the surface deform modifier to shape the base mesh again (save different characters' body shapes as shape keys in one object container/the same mesh object data) to make sure the topology is safe and stable.

10. for easily retargeting animation later, we will deform the characters' meshes as t-pose with armatures,
use the rig guide mesh with surface deform modifier by base meshes to get the joint position and bone roll angle roughly,
and the base meshes have rough weight for the standard rig already,
then we can create the rough armature to rig the character
(no need to detail/polish too much about armature and weights before we get the t-pose meshes)

set a t-pose by the rough armature,
then we can polish the mesh shapes (mostly about shoulders, palms, and feet)
duplicate the armature then polish the joints' position and bone roll angles(by using bone constraints,
apply the meshes and armatures then re-rig them and weight paint carefully this time,

there is another test I will try, using cage mesh to transfer weights instead of tweaking stroke by stroke.
and at this stage, I found some of the texture details should work better if modeling their shape by vertex editing, which I should try later,
we can tweak the output topology for better dynamic deformation then animating and the output uv for better look or performance if needed,
test to switch different characters’ equipment by surface deform modifier,
retarget humanoid animation clips,
try pose space deformation (corrective shape keys) for important keyframes,
11. use an add-on called Face It to rig their faces to generate AR-kit standard facial shape keys/blend shapes,
then we can use an iPhone to mocap the facial animation clips and then apply them to our characters, (presented on the old posts)
12. test procedural pixel-art textures baked from high poly meshes or filters on Photoshop,
then try to animate the facial sheet by UV offset

...
Feel free to contact me by joining the Discord Channel,
leaving a comment here,
or mailing to chambersu1996@gmail.com,
if any questions or anything here interests you~
I will reply ASAP unless I fall asleep, mostly in 12 hours~