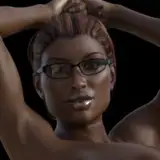
This is something I only really found out about recently, but I figured it should be within public knowledge as its a damn useful technique. Credit has to go to Breadblack who served as inspiration for this tutorial- his work makes HEAVY use of these highlights. And as a treat for the holidays, this tutorial is going to be completely free! (Future tutorials will be on the $3/mo tier, and also included for all legacy and $5/mo tier patrons.)
I'll be using photoshop for this tutorial. Unfortunately, I don't know of the existence of any similar functions in alternative programs.
First and foremost, make sure you have a render. I would HIGHLY recommend creating one using an image sequence as you can generate a depth file. A depth file is takes the image you have and puts it into a white-grey-black gradient depending on the depth between your camera and the objects. We're going to flatten it out further to create a mask the highlights follow- you can use a magic wand --and I know breadblack does-- but that might not be possible for every render you do, so this is the method I'm going to go over. If you don't know how to create a depth file OR render an image sequence...
Now, open your two images in photoshop. The PFM will probably look something like this:

The PFM is a 32 bit color file, which means you'll only have access to levels and exposure. This is fine! We can use adjustment layers here to adjust contrast- ideally, your character (or at least the foreground) should be a black silhouette thats very easy to make out, with the background being grey or white. If there's any weird artifacts, paint over them on a new layer.

Since our render is only 8-bit, it's going to freak out at the presence of a 16 bit HDR output. Go into Image > Mode > 8 bits/channel...

...Merge your adjustments...

...the results for HDR toning may vary. If you are certain you have very good contrast, you can keep it unchanged by selecting exposure and gamma. If not, leave it on local adaptation and select the flat preset. Make sure you can actually select your character with the magic wand tool, and go back and refine if you can't, until you can!
Hop back into your main render and go into the channels tab. Create a new channel. This will hide your RGB, meaning you can safely paste in your depth into it.

If you now show the RGB whilst alpha is still visible, you'll notice that that the render will be overlaid with shades of red. Dark red means black and transparent means its white. That means it's working.

If you just want to add depth of field, make sure any effects that might affect the shape of your alpha are already done (such as liquify) and then go into filter>blur>lens blur. Click on your character and jack the radius all the way up- if the background is blurring, you've done it right. If not, or worse, it's blurring your character, adjust your alpha again.

And that's that for depth of field!
If you want to add edge highlights, create a new layer and use the magic wand tool to select your character from the alpha channel:

Deselect your alpha and go back into RGB mode. Now go into edit > stroke

Adjust your settings based on what color you want the highlights to be. Have it on "Inside". 5px width should be more than enough.

Obviously, this is going to need some refinement. Give yourself a layer mask and begin erasing parts out with a soft eraser. You'll want to target any harsh crevices and parts that shouldn't be highlighted.

Here's my settings. I use a low flow as it allows you to build up between 0 and 100% opacity a bit more subtly.

Here's a quick example I did in a minute. Please spend more than a minute on these. Pretty please.
Anyway, that concludes the first tutorial I'm writing on here. I hope it was actually understandable ;_;