Behind the scenes & process: The First Scene
Added 2024-03-05 01:27:16 +0000 UTCHey everyone, it's been a while since I last shared a text tutorial with you all.
Life has been pretty busy lately, and I haven't had much time to sit down and write, so apologies for the delay. However, I'm excited to say that I've begun working on my thesis, and it's been quite the journey. In this post, I'll be diving into the process behind the first four shots I've recently shared, which depict the initial act of the murder scene.


Storyboard
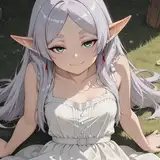
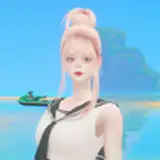
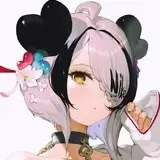
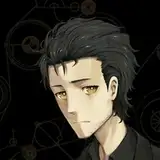
Premise Overview: Our main characters, Ami(the boy) and Mia(the girl), are actors who will be featured in a diverse range of film productions.
I aimed to craft an engaging and captivating opening, so I opted for a suspenseful movie to kick things off. The scene entails Ami opening the door only to discover Mia dead in her own home.
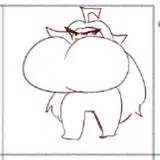
The storyboard was sketched by memories, amidst a whirlwind of thoughts encompassing the entire movie—more than ninety shots. There was no time to seek reference.

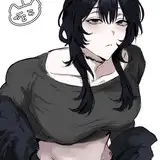
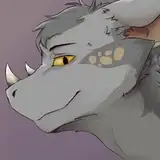
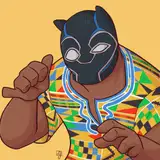
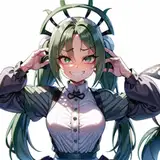
The initial shot zooms in on the face of the first protagonist, Ami, viewed from above, highlighting his defining features.

In the second scene, an aerial view captures the entire setting: a grim scene of death. The cluttered room and the positioning of Ami and Mia are distinctly visible, providing a clear perspective of the scene.

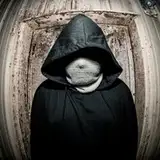
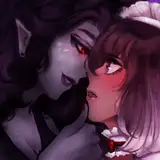
The third shot transitions behind Ami, revealing Mia lying lifeless on the ground.

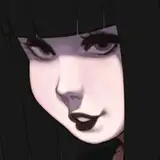
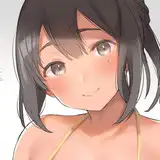
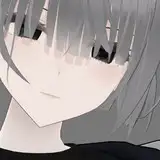
Finally, the camera zooms in on a close-up shot of Mia. Clearly show the stylized features of Mia and the details of her death. (Girl with loose hair, things scattered around her, face covered by newspaper.)

Movie Material
This project is all about movie, and I'm trying to make it look and feel just like a real one.

To start, I looked at a scene from a Spanish movie called "The Invisible Guest" where someone dies inside a room surrounded by scattered bills.


I went ahead and incorporated Mia's death directly into them.
To clarify, this isn't the ideal method, but considering this is a animation with over ninety shots, and I need to update progress every week, I had to make do. My initial sketches lacked the detail needed for people to really understand the mood and impact of the scenes. So, it was crucial to create something quickly that matched the tone.
These sketches were just rough ideas and won't be in the final. I used movie stills to help me adjust them to capture the essence of the main character's story, allowing me to convey the atmosphere swiftly and effectively.
Scene Reference

For Mia's death scene, I envisioned a cluttered shot of a house seen from above. To create this, I searched the internet for images using keywords like "overlooking cluttered room" and gathered items to include in the collage.


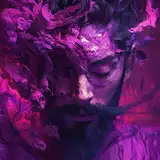
After this, I had a clearer picture of the opening scene and the atmosphere I wanted to create: a series of darker, more suspenseful scenes. I used red and green contrasts appropriately to highlight the dead character.

Real Photography
Instead of refining the two color keys right away, I decided to move forward with the remaining ninety or so storyboards. I needed to create a first draft of the full-length video for the teacher's review. So, I postponed refining the first scene for quite some time.
A few weeks later, I went on a trip to a hotel with a group of friends. There were four of us, and the hotel rooms happened to have many elements similar to those in the first sncene. On a whim, I asked my friends to help me shoot the necessary footage in live action at the hotel.

Here's how we did it: I set up my iPad next to me, split-screen, and had my friends pose for all the shots I needed. Two of them acted as actors, and one took on the role of photographer. As I set up the scene and adjusted the actors' movements, I walked around, making sure the shot matched the impressionistic picture in my head as closely as possible.

Second Photography
The hotel project was a spontaneous decision, but it turned out to be unexpectedly enjoyable, and the results were surprisingly good. This boosted my confidence in approaching the set with more seriousness.
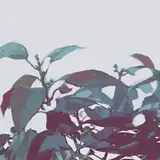
During this time, I also got a clearer vision of the scene and the color scheme for the first scene. I aimed to create a vintage film texture and color reminiscent of the image below.

In addition, I finalized the characters' costumes this time around. After my friends changed into their respective outfits, I took another shot at home.

I also borrowed my classmate's Ricoh GR2 camera because I wanted to experiment with real camera shots, aiming to achieve the texture of vintage film.
3D Modeling
The two shoots helped me realize that some scenes couldn't be fully captured just by filming, like the big overhead view in the second shot.
So, I turned back to Blender, a reliable 3D modeling tool. First, I created basic white models, setting up the stage, room, and character sizes.

Then, I scoured modeling sites like Cgtrader for objects that fit the scene's needs based on keywords like bed, closet, trash can, files, carpet, and cluttered room. I ususally check the [Free] option to find plenty of free files. Occasionally, I paid to download a specific item if it perfectly suited my needs.

After downloading the eligible files, I imported them into Blender.

Once everything was in place, I adjusted the lights above to create a room light with a top-down effect.

Lastly, I fine-tuned the lens to achieve a top-down perspective that matched the storyboard.

Refinement of the screen
Finally, it's time to open the drawing software! The current four shots don't need frame-by-frame animation, so I treat them as still illustrations.

Outlining - Adding Shadows.

Add local color.

Blacken the background, refine the door frame, and increase the reflection of the glasses.

Apply Gaussian blurring to the hand and door frame to create a sense of depth.


Add Noise to enhance photographic texture


The rest of the shots follow a similar approach. I continue to reference vintage film colors for the coloring, though for a suspense film, I allow the lighting effects to be a bit grayer.


The large overhead view of subplot 2 is tackled last. Since I already have reference colors from the first three shots, I can use similar elements to fill the entire scene.

Line art is added last, and only where it is visible and needed, such as the silhouette type of the character, the silhouette type of the document, and the lettering.


Adjustments for Continuity in Shots
As we're dealing with a continuous shot, it's crucial that the spatial relationships between the characters and the positions of props remain consistent across the different angles.

However, a challenge arose due to the order in which the paintings were done and the reference image used. The bottle next to Mia, the blood, the newspaper, the small objects, and the blanket behind her were all positioned differently.

To address this issue, I made separate corresponding corrections to ensure the scenes looked consistent.

While there are still some minor glitches, considering each shot lasts no more than a second in the movie, these flaws are hardly noticeable to viewers.
That's all! There might be a few more minor details to fix before the full animation is released, but for now, I consider it complete, yeah!
Although shooting and modeling may seem troublesome, having 15 shots in Part 1 and Part 2 connected together has proven quite convenient. This includes the modeled death scene, which will be used in Part 2. This experiment has helped me understand why many animation productions rely on 3D modeling—asset reuse is key!


When I was a kid, I used to enjoy drawing OC(original character) and imagining their stories. But back then, I didn't have much time or skill to fully develop their stories and pictures. Now, it feels like I'm secretly creating my OC animation under the guise of Thesis hehe.
Interestingly, even though it's called Thesis animation, it's actually going to be an animated music video. I've licensed an amazing song from a band I really love. The song, the art, and the story all align perfectly! I'm really thrilled about it. No matter how challenging it gets, I'm determined to see it through to the end!
Thank you all for reading! See you next time!
Comments
I am so looking forward to it omg!!!
Holly Cheung
2024-03-21 10:10:32 +0000 UTCAhhh Thank you Fury!!
Sheya
2024-03-16 01:46:38 +0000 UTComg this whole process is so amazing, and you have come such long way with your craft, it all looks so polished but also your art style is always evident, there's no way someone looks at it and doesn't know it's your art. Thank you for sharing with us this process and can't wait to see your animation!
Fury
2024-03-05 23:04:48 +0000 UTCThank you Keiji!
Sheya
2024-03-05 01:57:06 +0000 UTCWe are excited to see your art in the form of images in the future. Looking forward to seeing your animations completed now!
keiji
2024-03-05 01:51:43 +0000 UTC